Most bowhunters dream about adding another mature buck, bull or bear to their wall, but because money is tight for almost everyone, a full head-and-shoulder taxidermy mount is probably out of the question for multiple animals. For that reason, many hunters prefer to showcase their animals with tasteful European mounts.
Very few hunters are capable of completing a head-and-shoulder deer mount without it looking like a horror movie prop, but a DIY European mount is certainly doable with a bit of time, effort and the correct supplies.
YouTube is filled with tips for completing DIY European mounts, but one you can suggest to your customers is shown here.
DIY European Mount Overview
If you choose to stock and sell DiY European Mount supplies, then you and your sales team should watch the video so you have a decent understanding of the process involved.
The first steps in the job include removing the skin and fur from the skull, getting as much muscle off as you can, then making sure all hair/skin/fur is removed from antler/horn bases. The more you can remove here, the better; basically caping the head out without the need for precision because you aren’t saving the cape.
The next step is boiling the skull for 2-3 hours in a big pot with Borax. A pot designed for turkey friers works well. Boil until most muscle and other matter falls off. Remove the skull from the boiler and let it dry.
Next, continue removing matter by soaking the skull in the hottest water you can pour with Dawn dish soap added. Take the time to clean all bits, pieces and particles by hand. It’s a bit tedious and might take a couple of Dawn/hot water/scraping jobs. The nasal passages and brain cavity are the toughest spots to reach. A long, stiff scrub brush and wire coat hanger can help. The goal is to remove everything from the skull that isn’t bone.
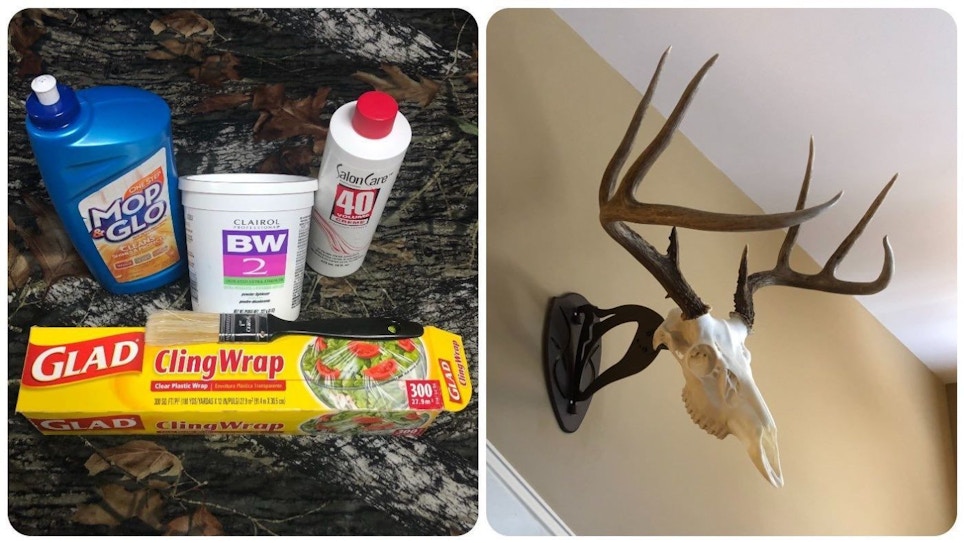
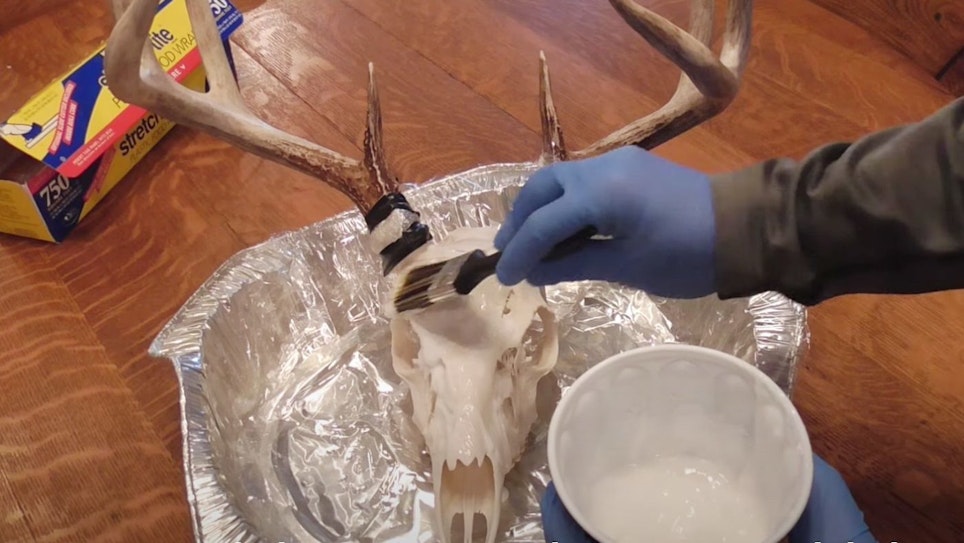
The most difficult part in the entire DIY project is prepping the skull for whitening. FYI: The buck shown below was completed using the steps discussed here and in the video, expect the hunter chose not to use Mop & Glo for the finish because he wanted a natural look vs. a shiny look.
The hunter who completed the DIY European mount shown here let the skull sit for 24 hours before taking off the wrap. After removing the wrap, thoroughly rinse all powder and cream, then wipe off with a white rag or paper towels. It comes off fairly easily, but does stick in the little nooks, in areas like the crease between the base and skulls, so wiping down with a white wet cloth or paper towels helps finish it up. Note: After you finish wiping down the skull, you may notice that it continues to whiten a bit over the next 1-2 days.
Whitening Products
While your customers can purchase the whitening products to complete a DIY European mount outside of your shop, they’ll not only appreciate the advice you can provide on the project, but it’s more convenient for them to purchase the materials from you rather than visiting a hair salon, or placing an order on Amazon and then waiting for the supplies to arrive.
To help you customers interested in such a project, consider stocking these items or similar products: Salon Care 40 Volume Cream Developer (peroxide) and Clairol Extra Strength Powder Lightener. In addition to the whitening products, you could also stock and sell Borax, Mop & Glo, brushes, and even the electrical tape, clear plastic wrap and disposable gloves required to complete the project.
It also makes sense to stock products such as the Skull Hooker Table Hooker and Little Hooker to display a DIY European mount. Click here to learn more about Skull Hooker offerings.


